
Marketing
Why are reviews important for your retail store?
Reviews guide customers as they make choices, foster trust, and can even give sales a significant lift. If your clothing...
How To Change Your Clothing Shopify Store’s URL and Name?
eCommerce

The name and URL of your clothing Shopify store are your brand's online identity. If you’re thinking about changing them, it’s probably because you’re rebranding, growing your business, or improving.
No matter the reason, updating these details is simpler than it seems, and today we will show you how to change Shopify URL and name.
Good planning allows you to switch smoothly without disrupting your business or losing your customers’ trust.
Let’s go through the process step by step.
Check out: The Ultimate Shopify Dropshipping Guide
Your Shopify clothing store name is the name that shows up in different parts of your store, like the admin area and emails to customers. It’s an important part of how people recognize your brand.
Meanwhile, your URL is the web address that customers type in to visit your fashion store. You can think of the URL as the online ’’front door’’ to your brand.
You can change your clothing store name quickly in Shopify, but updating your URL takes a little more work, especially if you’re moving to a custom domain.
Both your store name and URL are important to make sure your brand looks consistent and professional.
Changing your fashion store name is a simple process that can be done directly from your Shopify admin dashboard.
Follow these steps on how to change Shopify store name:
Access your Shopify account by entering your credentials.
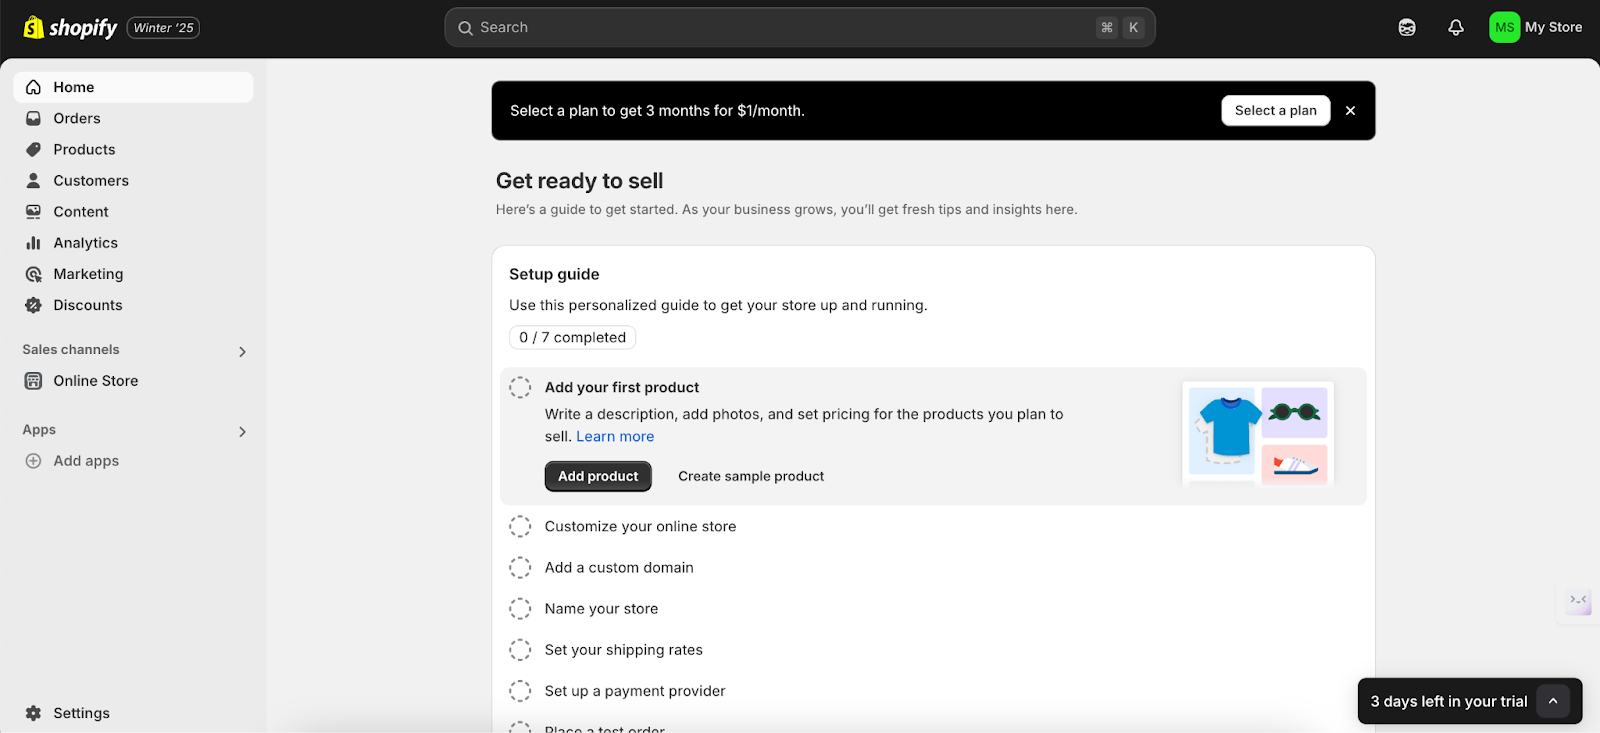
On the bottom left corner of the dashboard, click on ’’Settings’’.
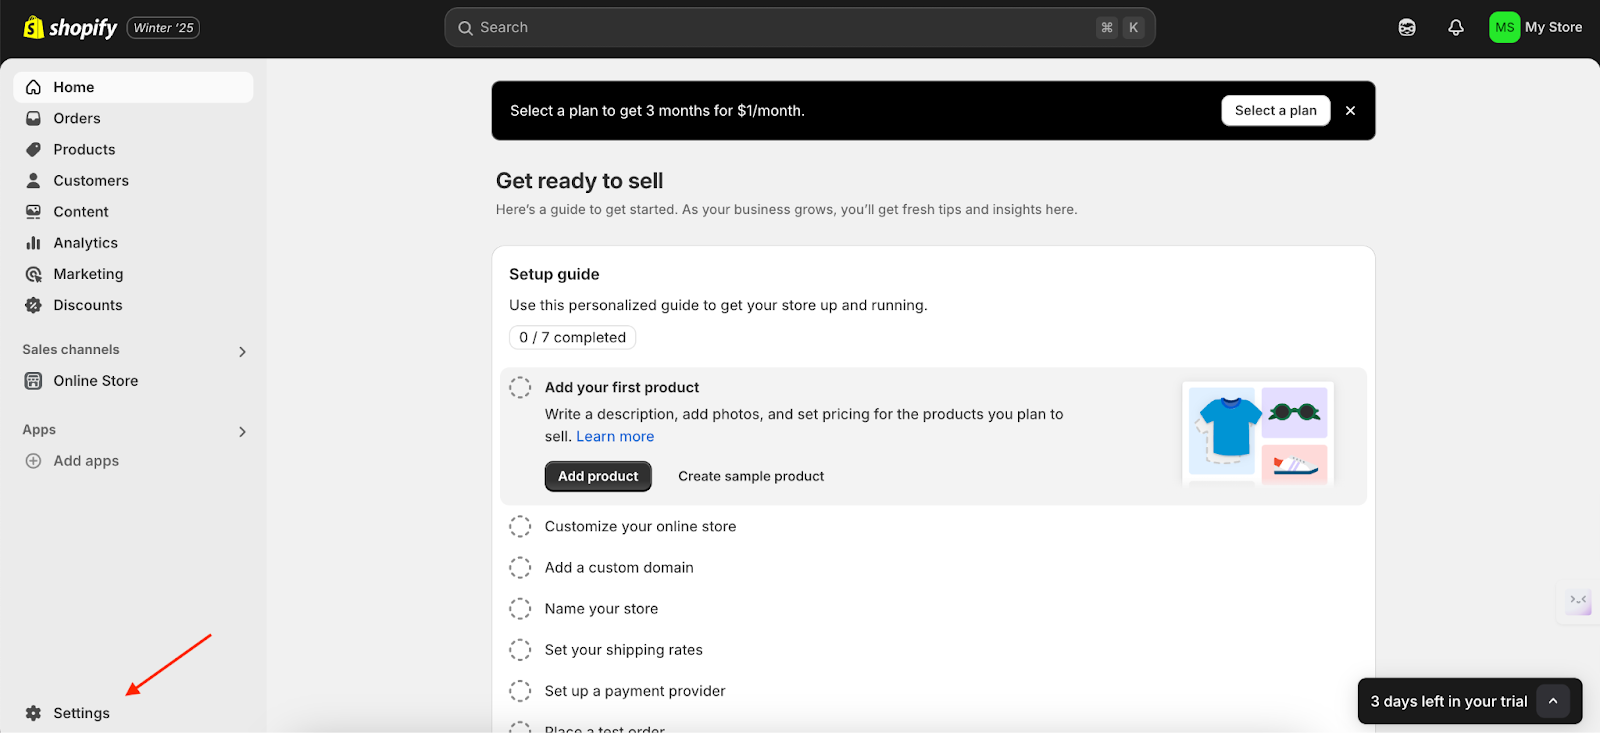
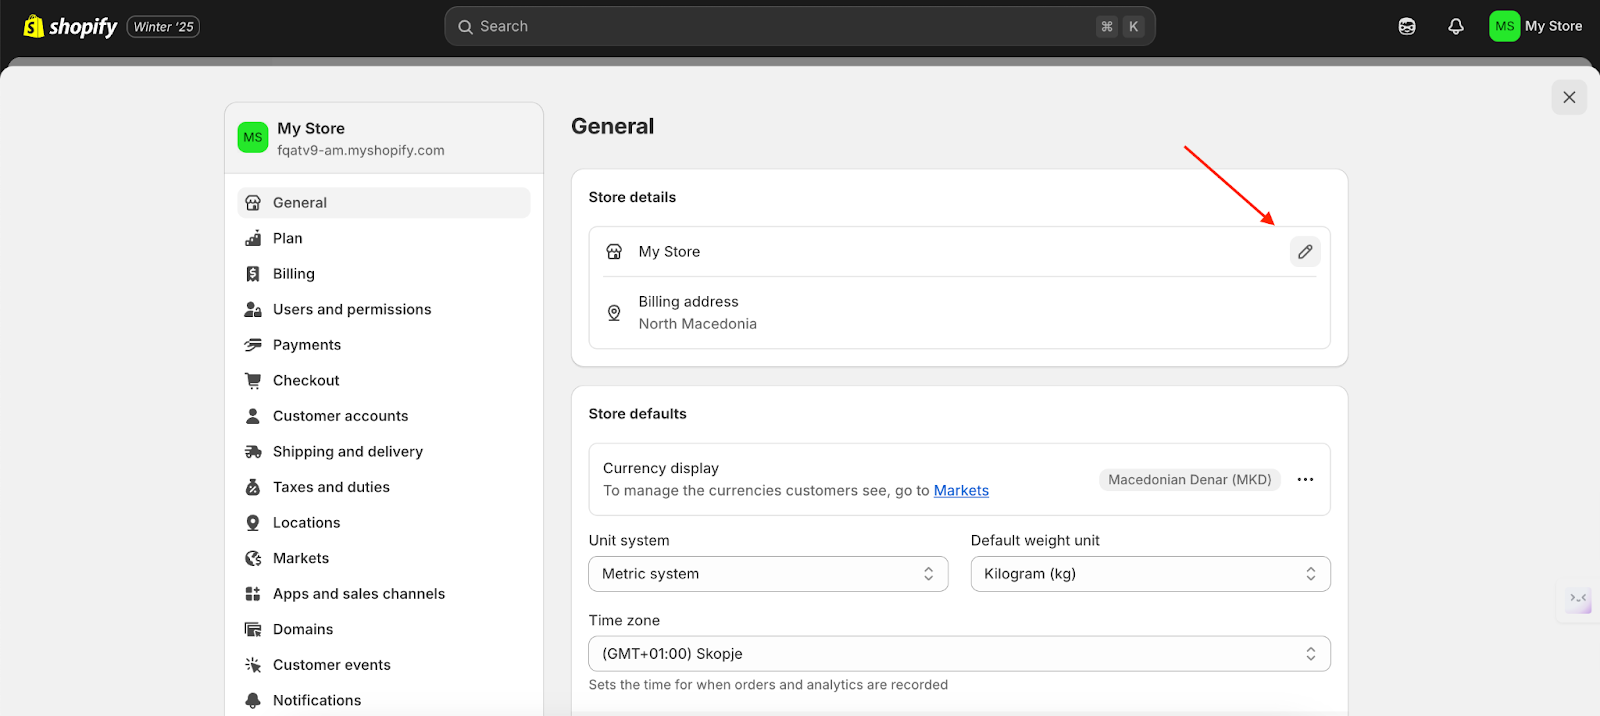
Within the settings menu, click on ’’My store’’.
In the ’’Store name’’ field, type in your desired new store name.
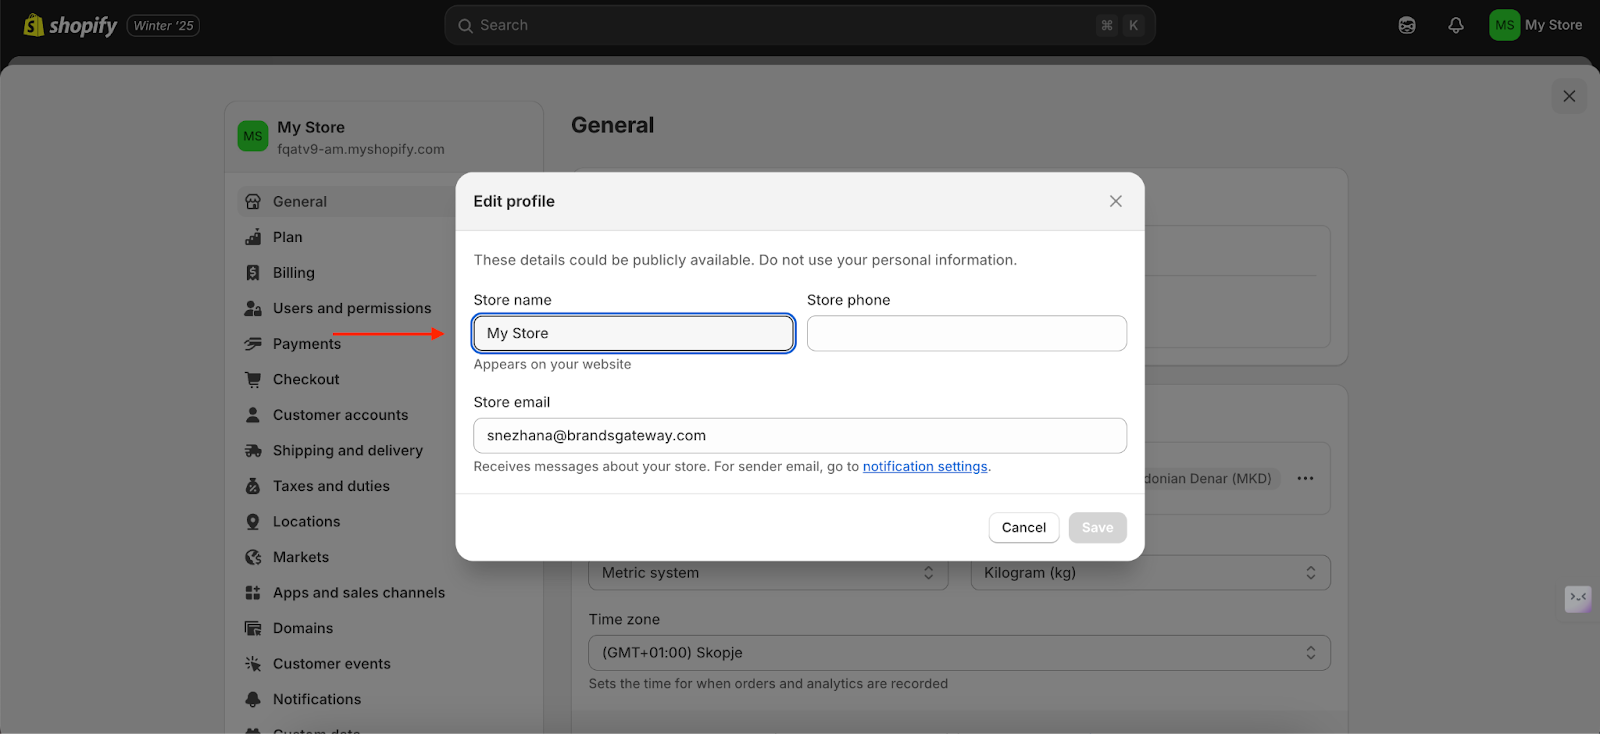
After entering the new name, click ’’Save’’ to apply the changes.
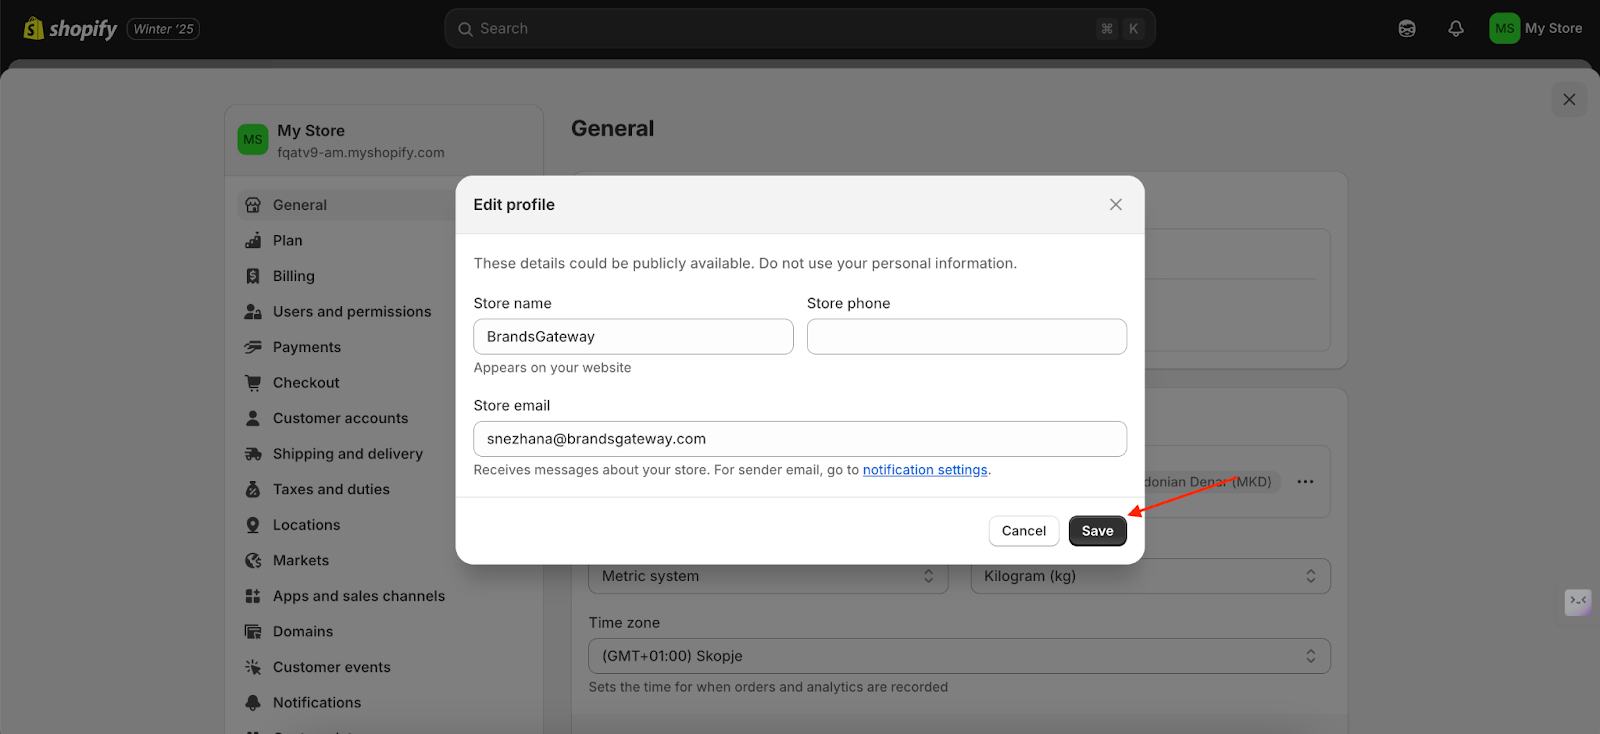
Changing your Shopify clothing store’s URL can be a vital part of rebranding or improving your online image. It means creating a custom web address that matches your brand.
Here’s a simple guide to help you do it step by step.
When you set up a Shopify clothing store, it gets a default web address that looks like (your-store-name.myshopify.com).
You can’t change this default address. But, you can buy or link a custom domain to give your customers a more professional and unique URL that matches your brand.
Shopify makes it easy to buy a custom domain right from their platform. This way, the setup is straightforward because Shopify takes care of all the settings for you automatically.
1. Log in to Shopify admin
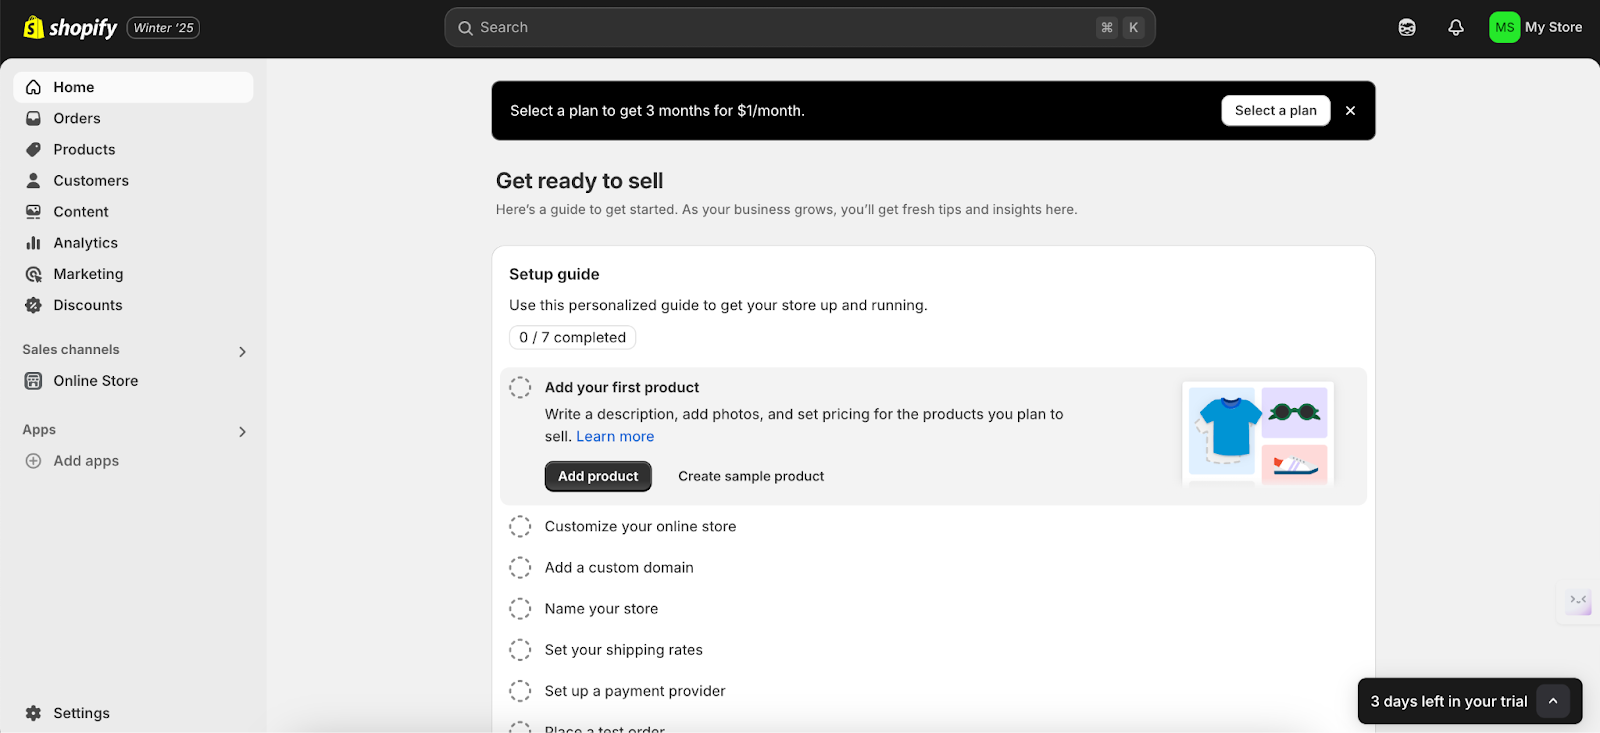
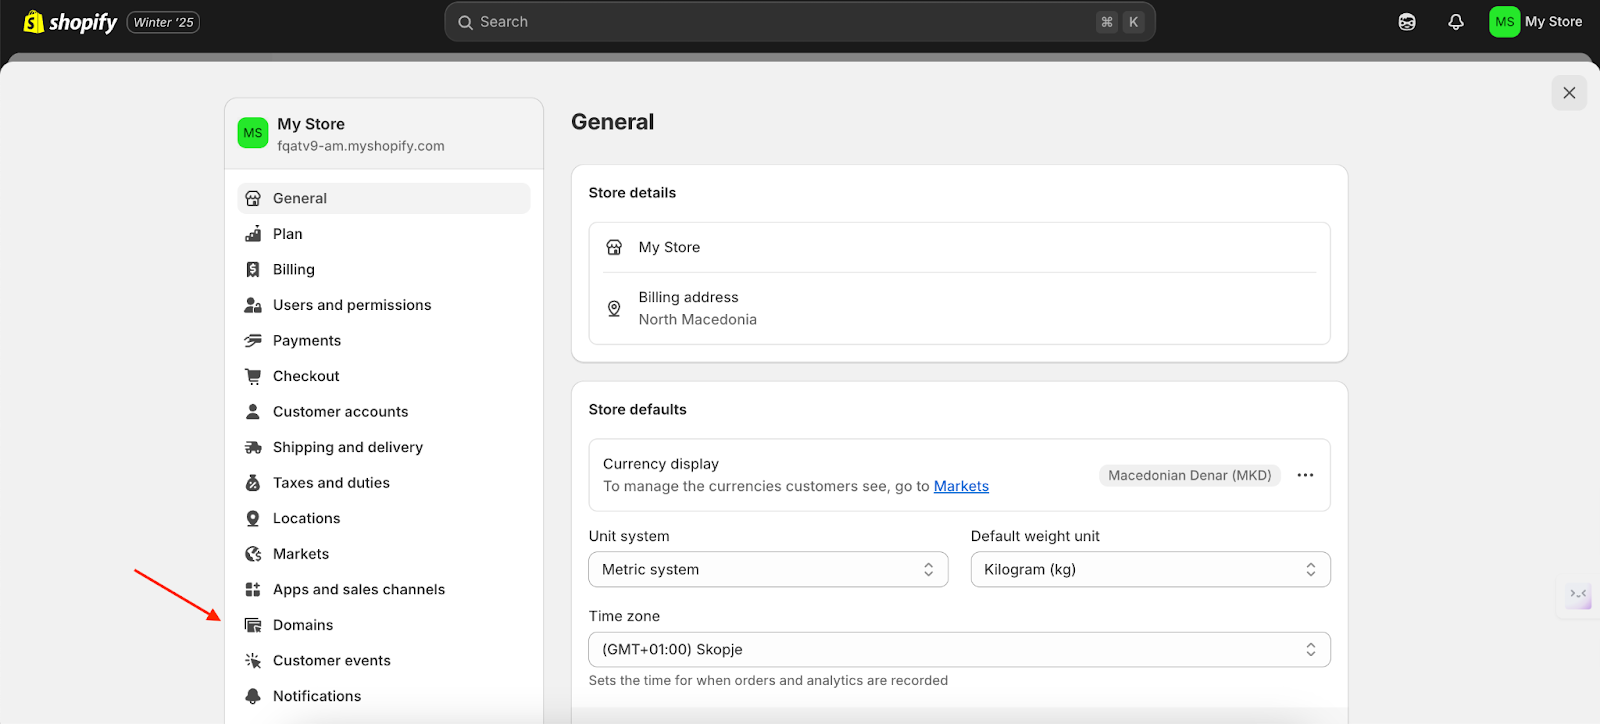
2. Go to ’’Settings’’ in the left bottom corner and then choose ’’Domain’’
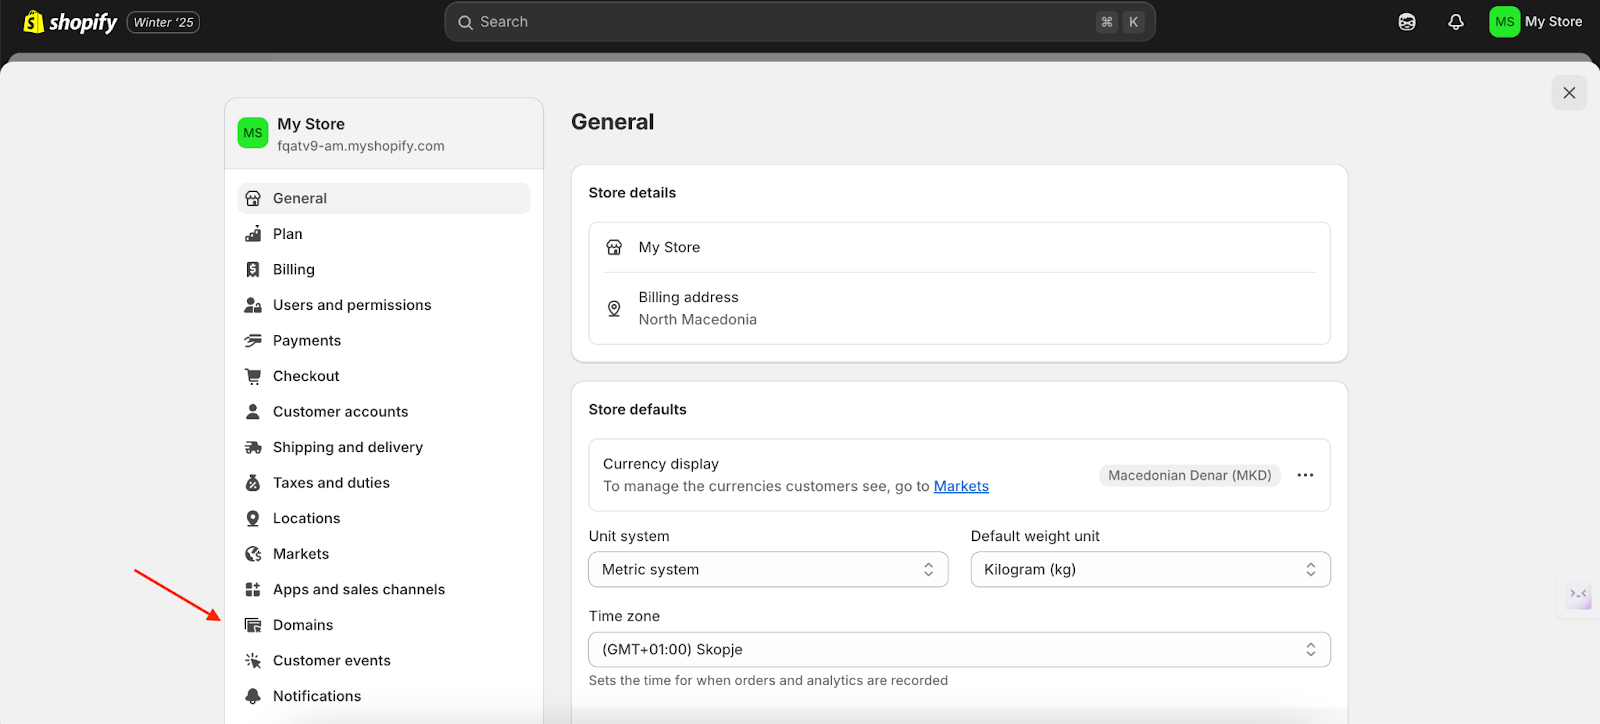
3. Go to ’’Buy new domain’’
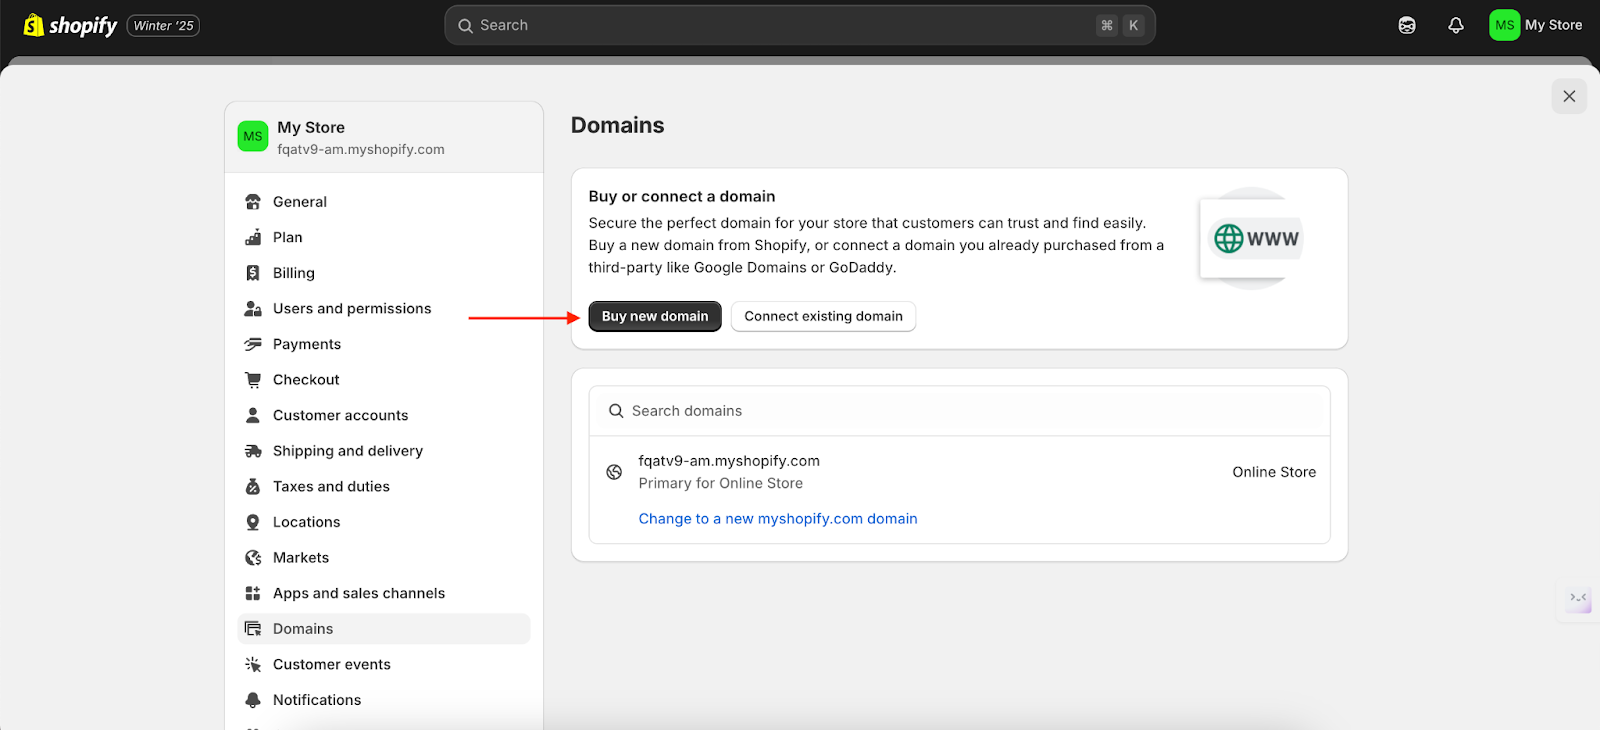
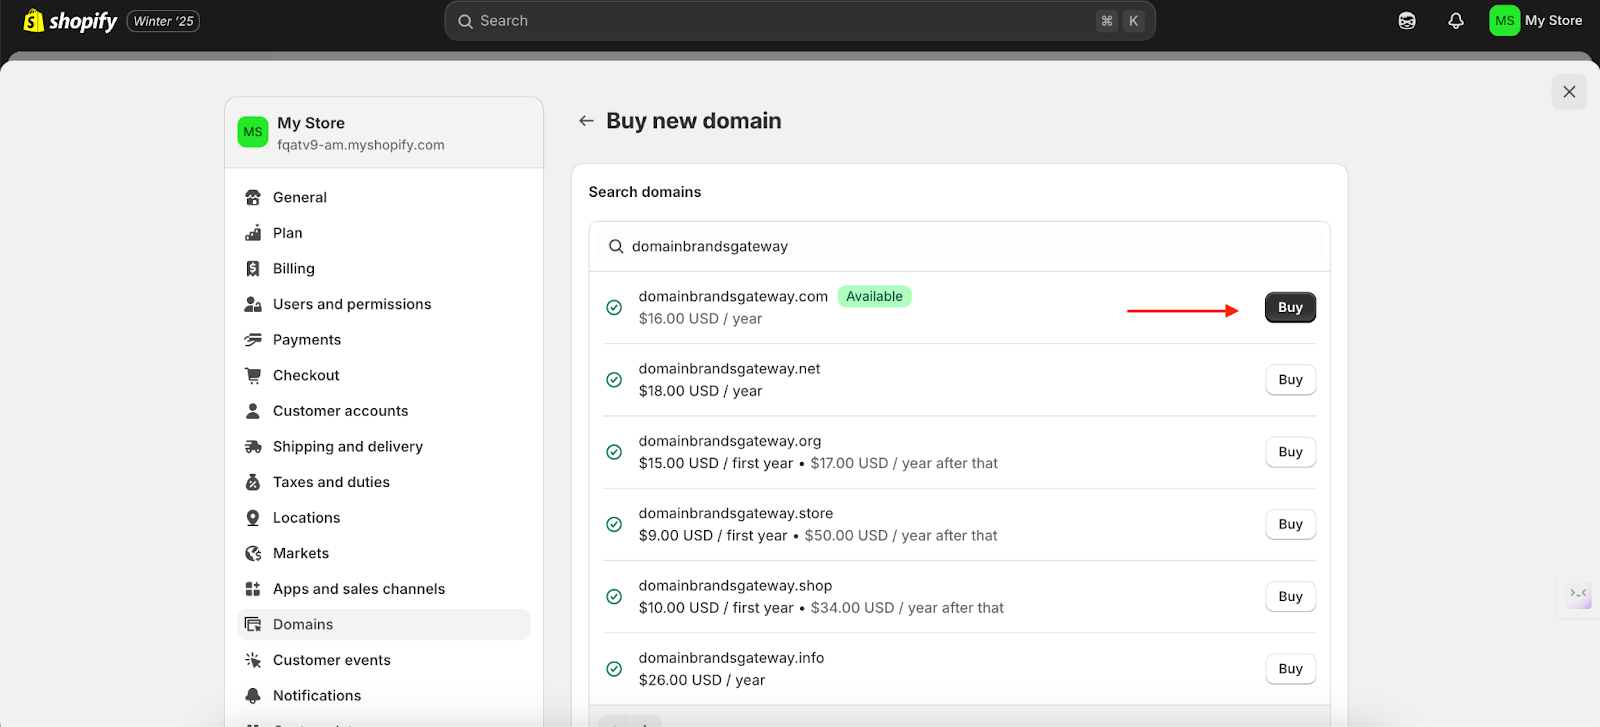
4. Pick the domain you want and check its price
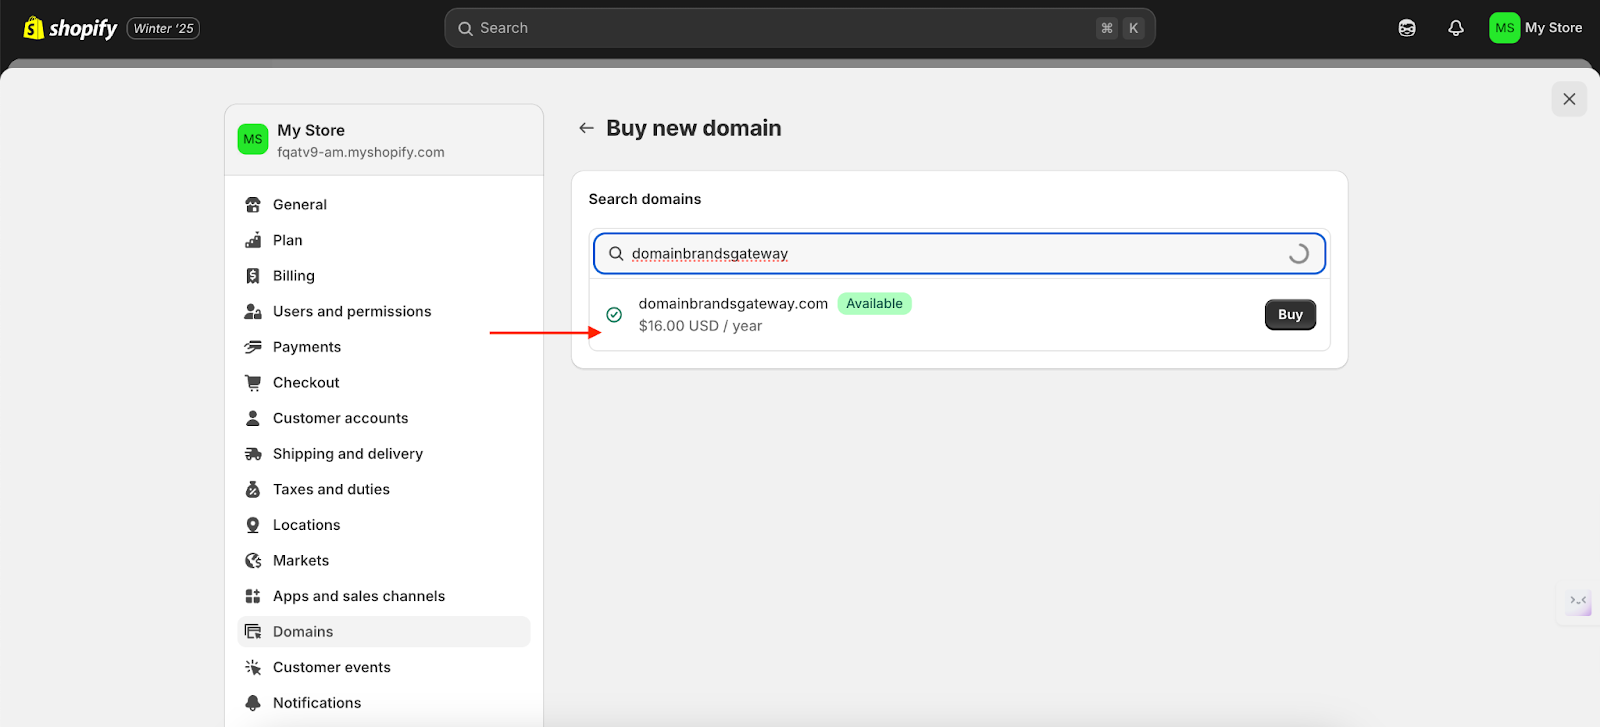
5. Choose your domain click ’’Buy’’ and purchase your domain
If you’ve already purchased a domain from a third-party provider like Namecheap, you can connect it to your Shopify store.
1. Log in to your Shopify admin dashboard
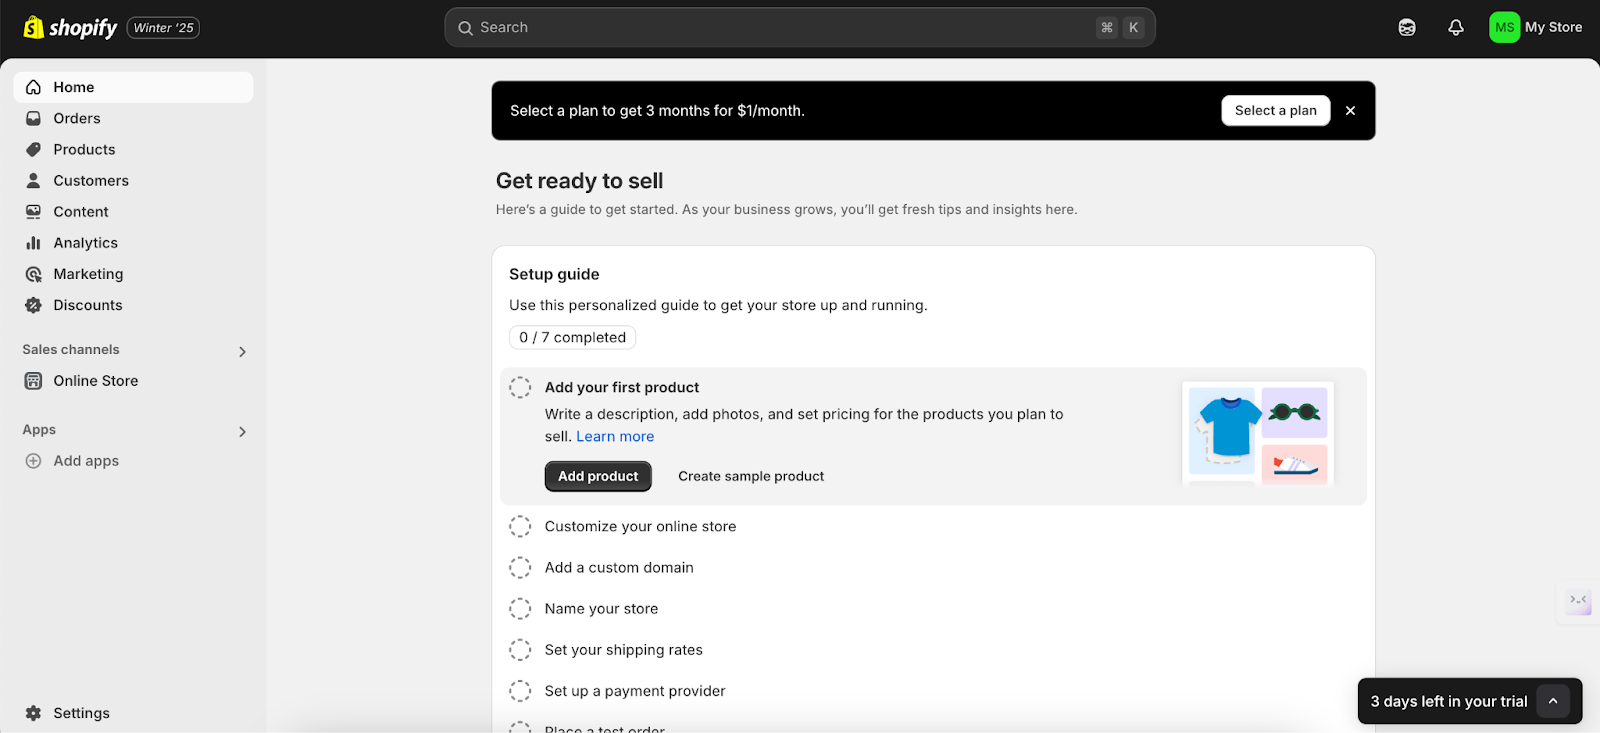
2. Go to Settings and then Domains
3. Click on Connect existing domain
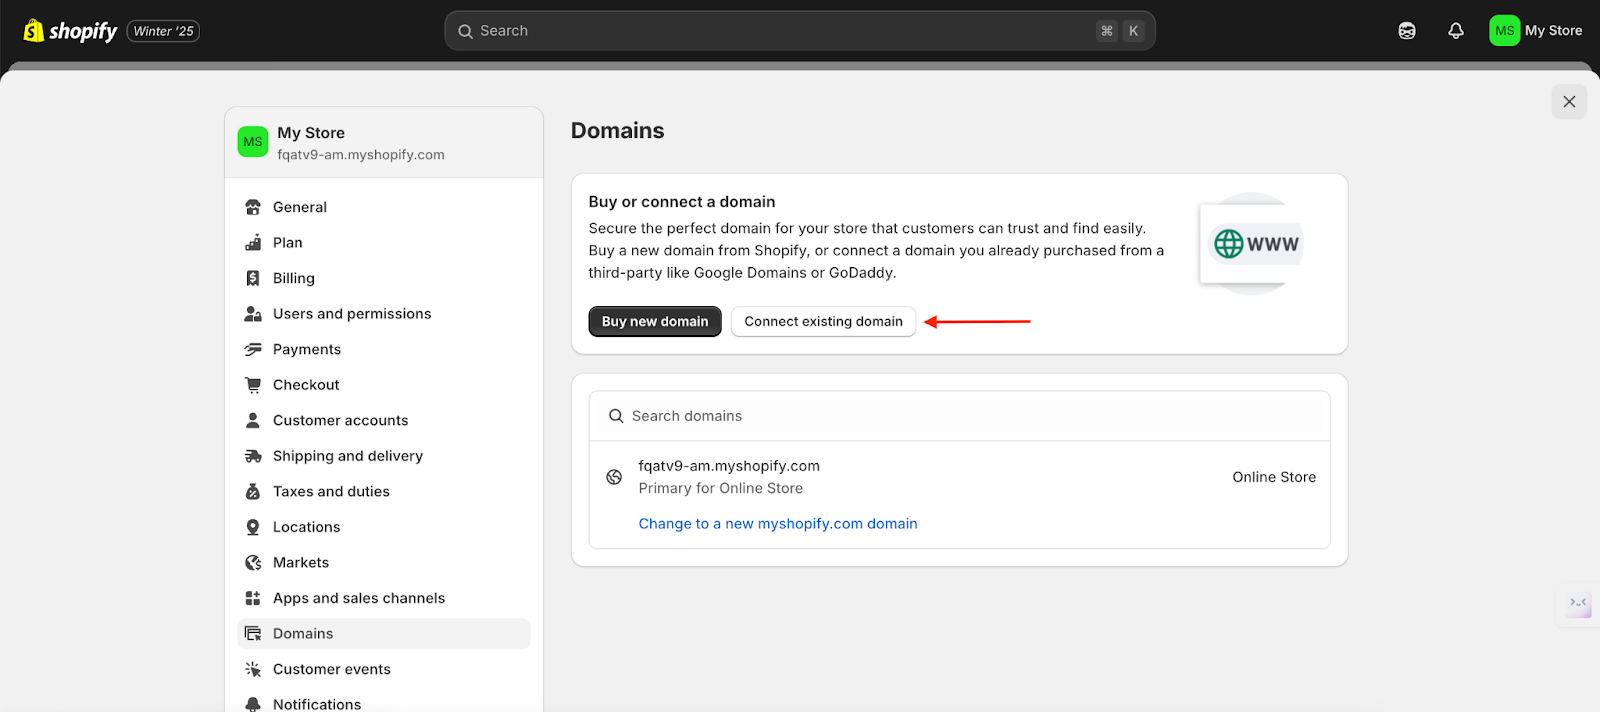
4. Enter the domain you want and follow the on-screen instructions
5. You’ll need to update your domain’s DNS settings through your domain provider.
Note: DNS changes can take up to 48 hours to propagate.
Ensure that all internal links within your store, such as navigation menus, product links, and collection links, reflect your new custom domain.
This step prevents broken links and provides a seamless experience for your customers.
1. From your Shopify admin go to Online Store > Navigation
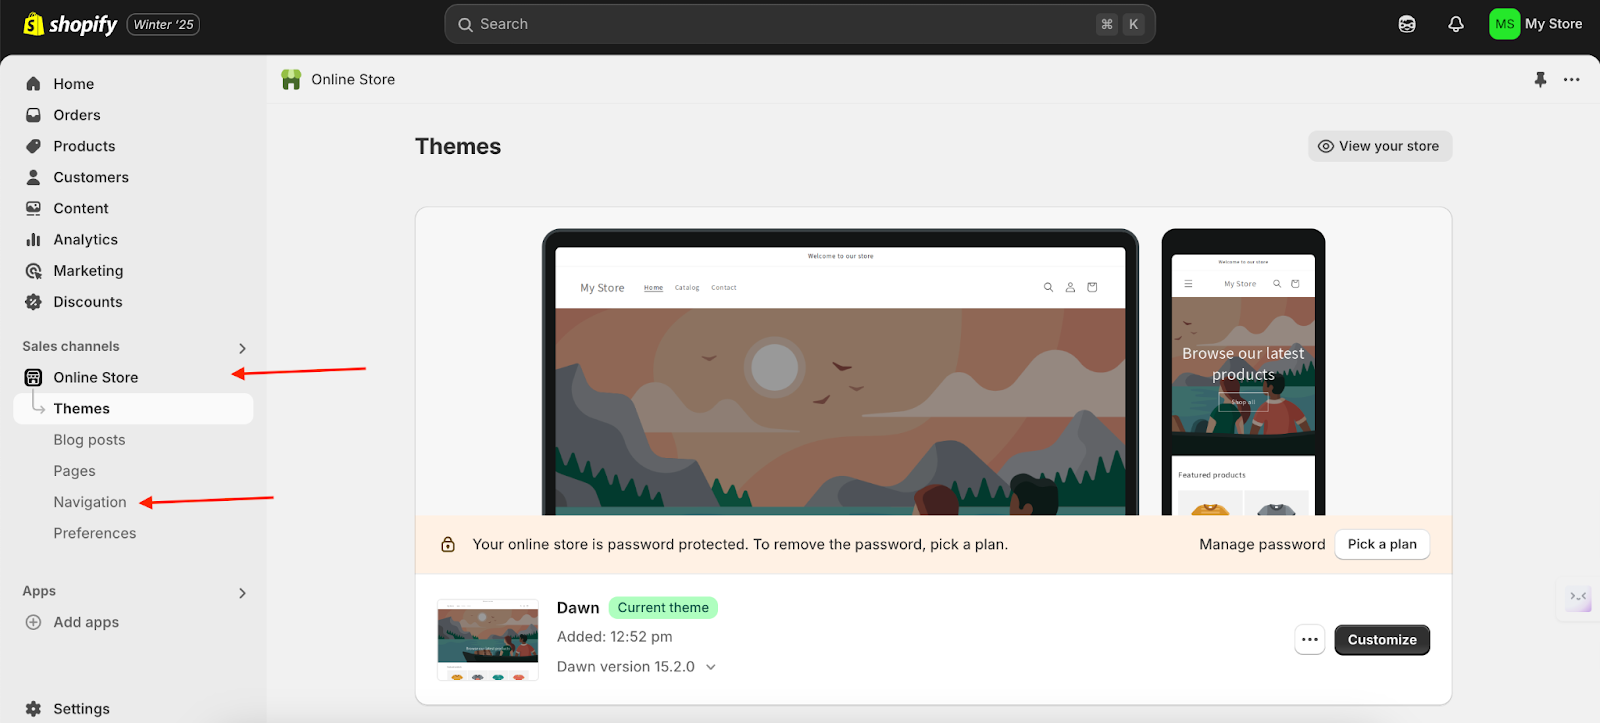
2. Select the menu you want to edit
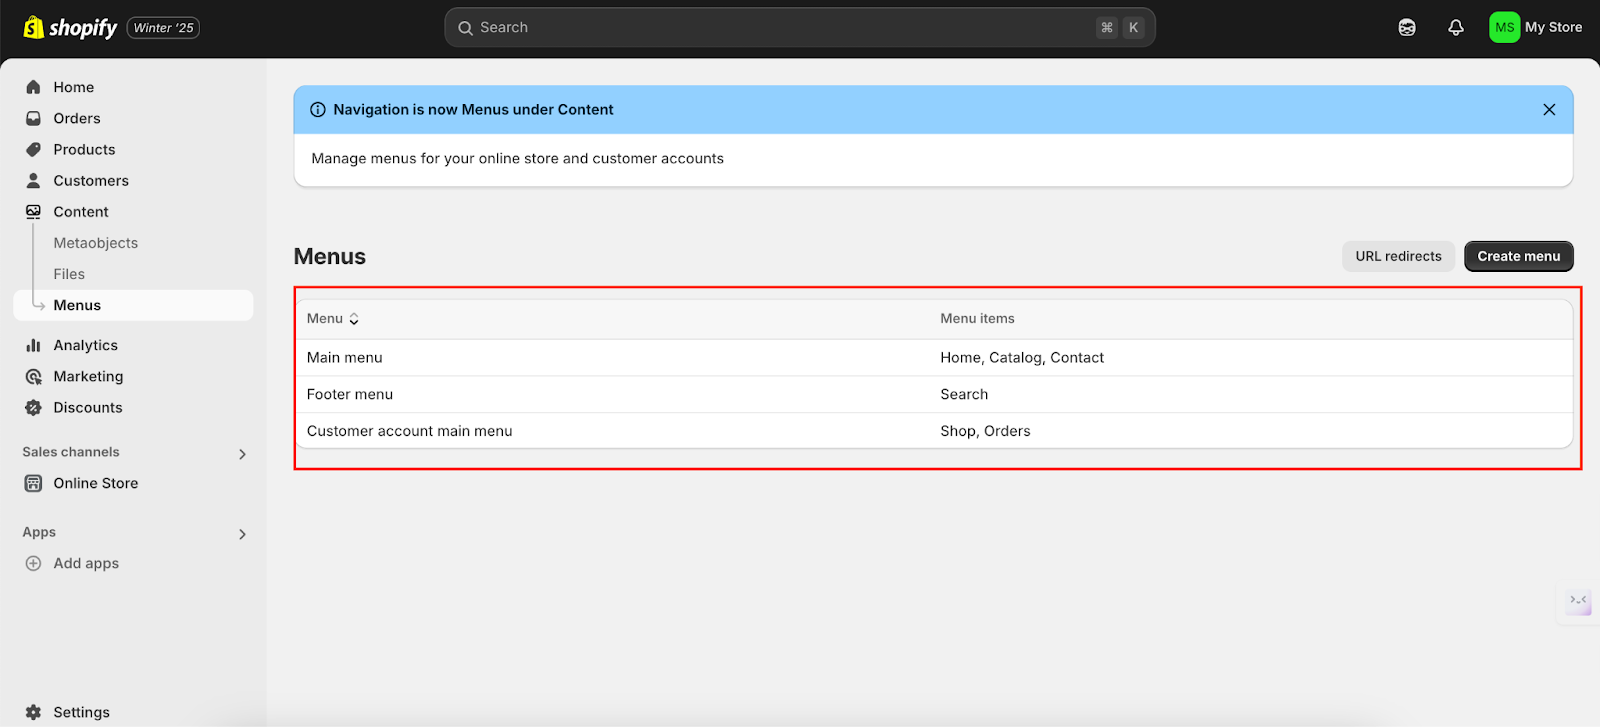
3. Update the links to reflect your new domain
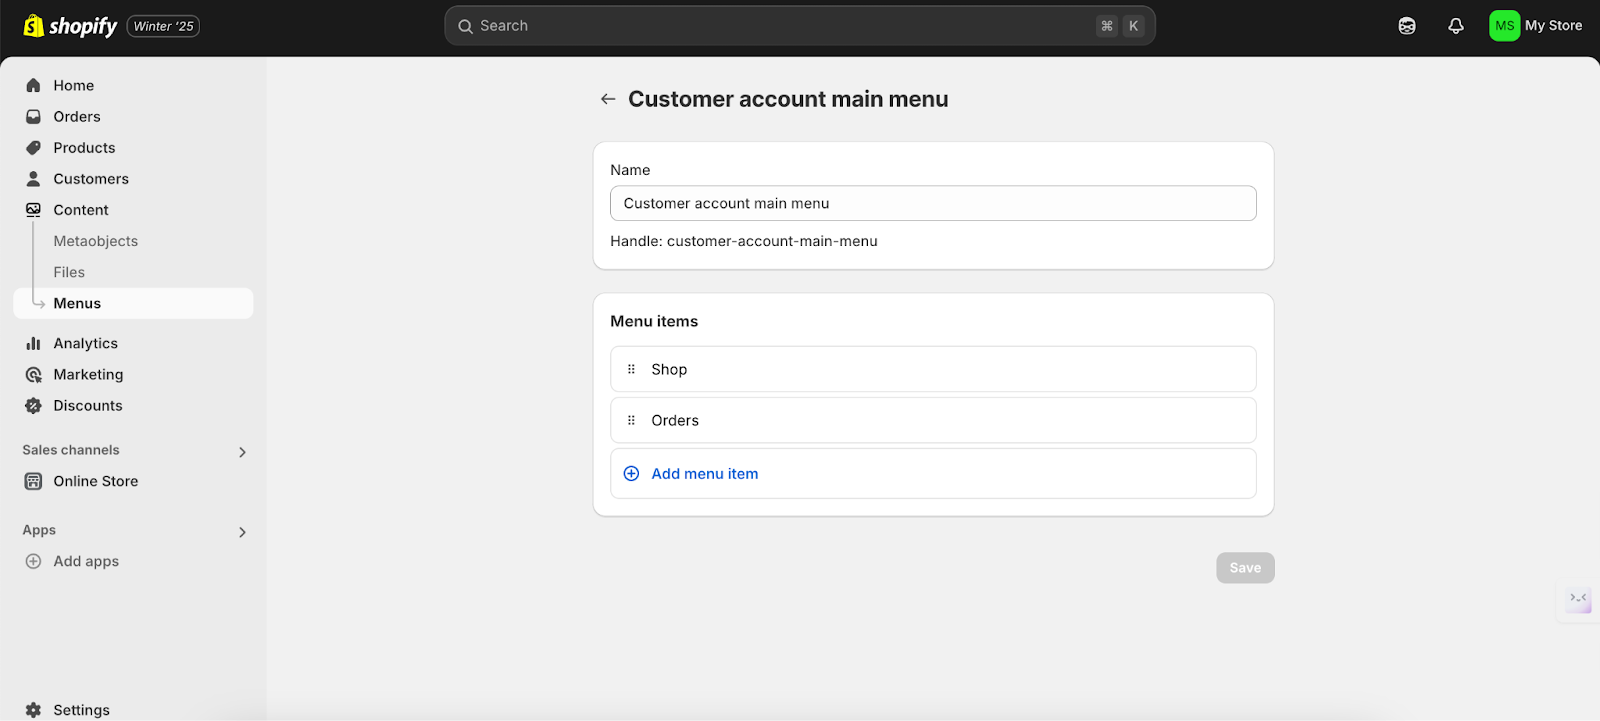
4. Click Save
A 301 redirect is a permanent way to move visitors and search engines from one web address to another. It’s like setting up mail forwarding to a new home so everyone knows where to find you.
This keeps your website’s search rankings strong and makes sure users have a smooth experience.
1. In your Shopify admin go to “Online store’’ and select “Navigation’’
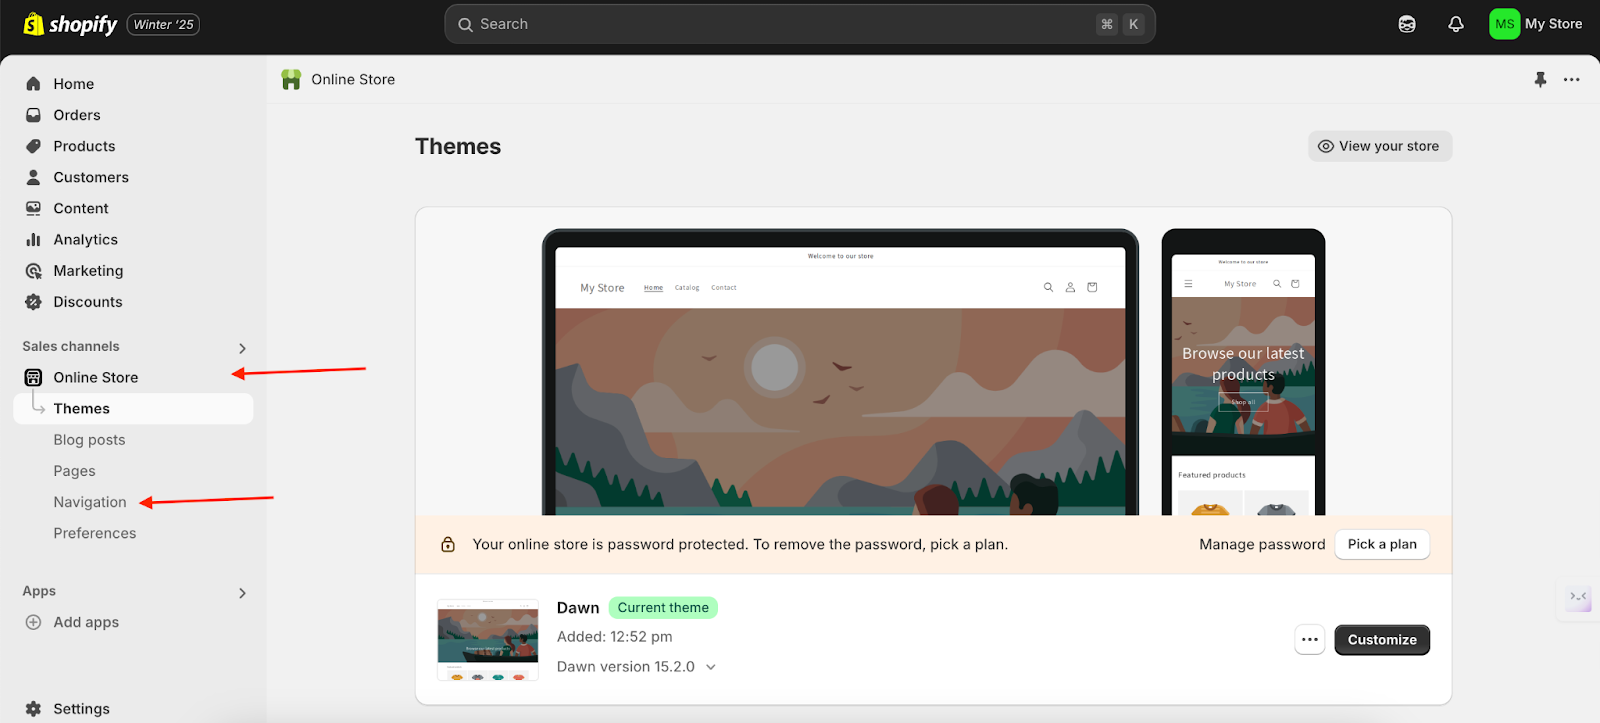
2. Go to “URL redirects”
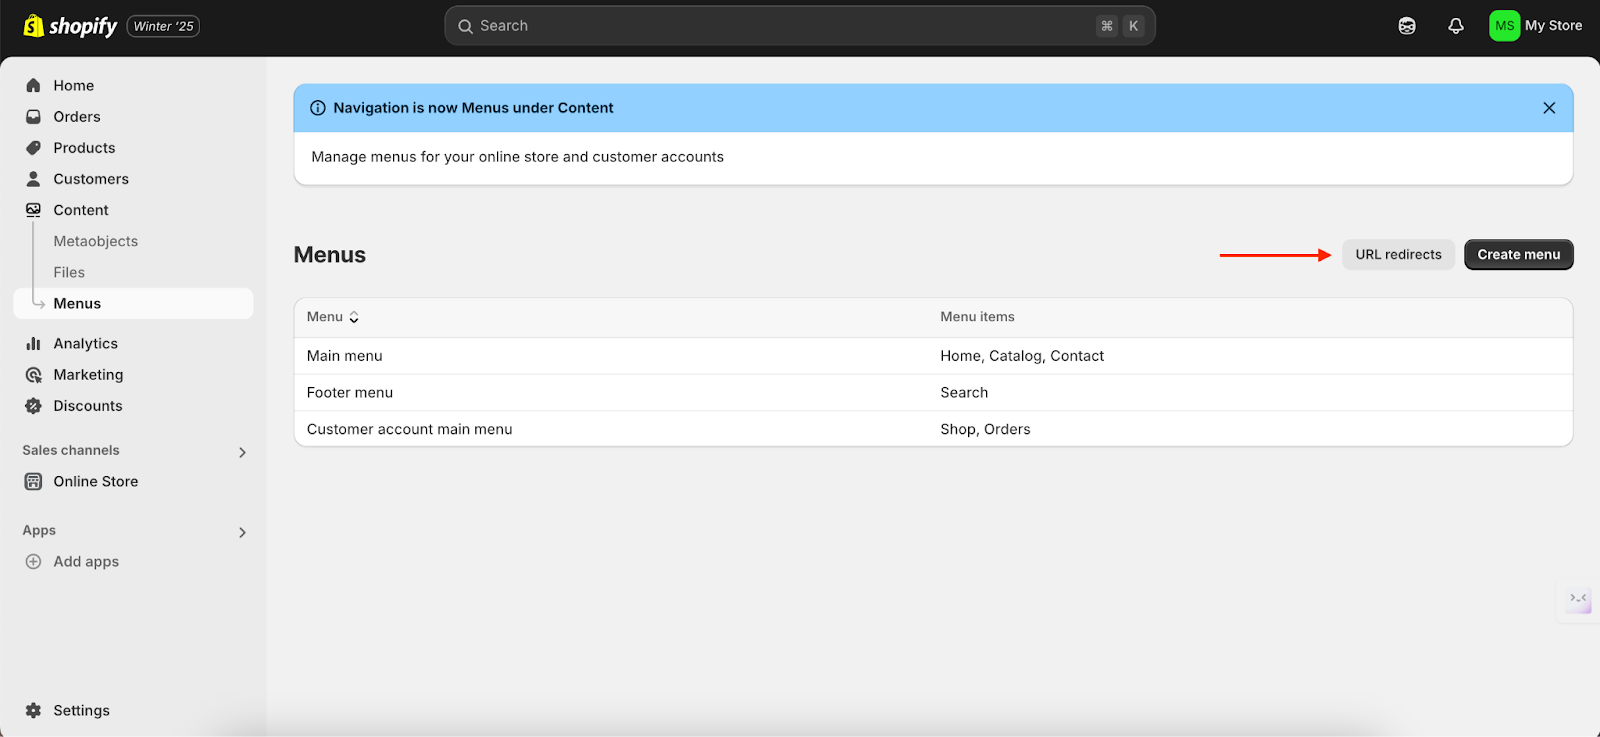
3. Click “Create URL redirect’’
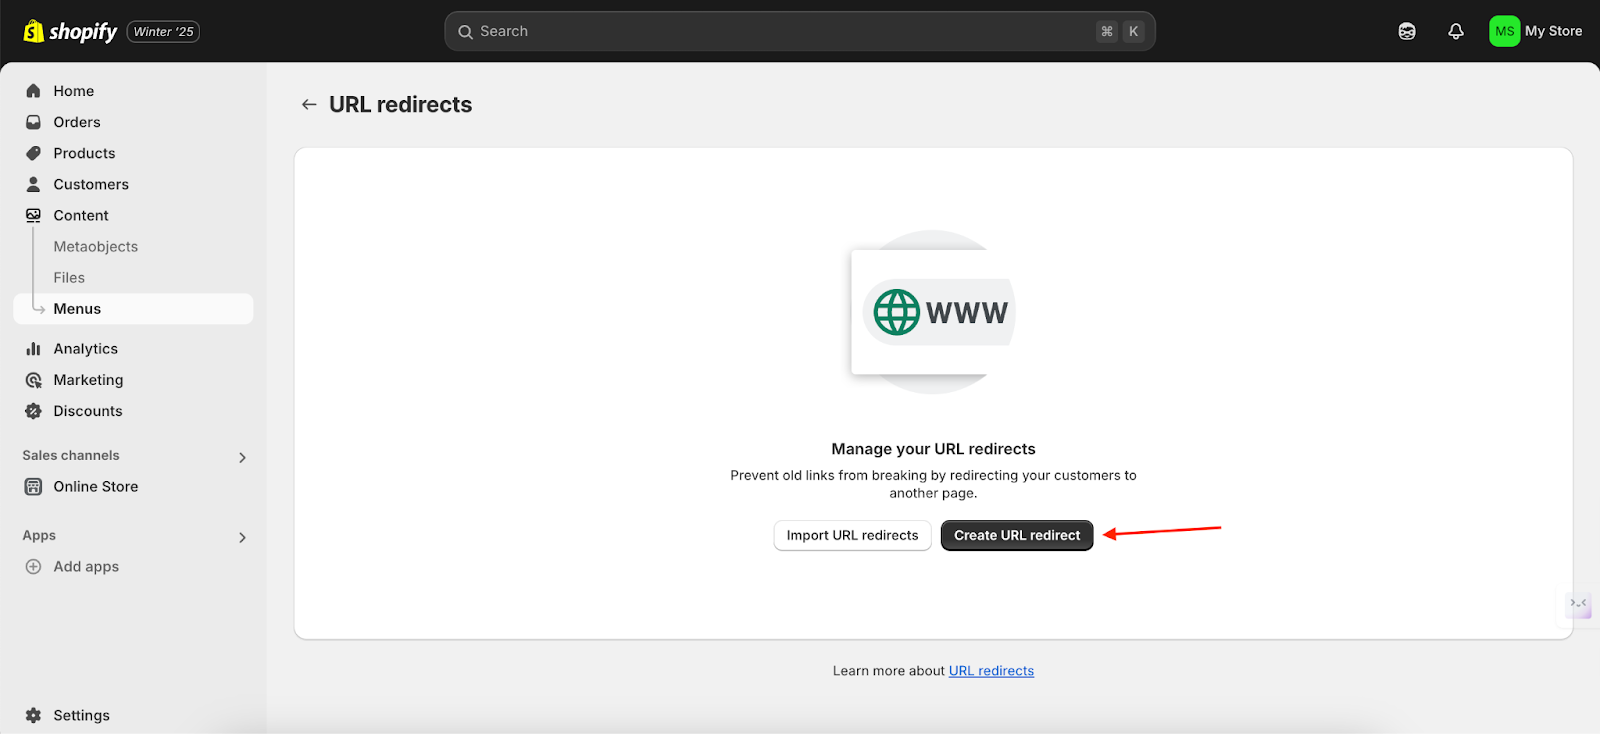
4. Specify the old and new URLs
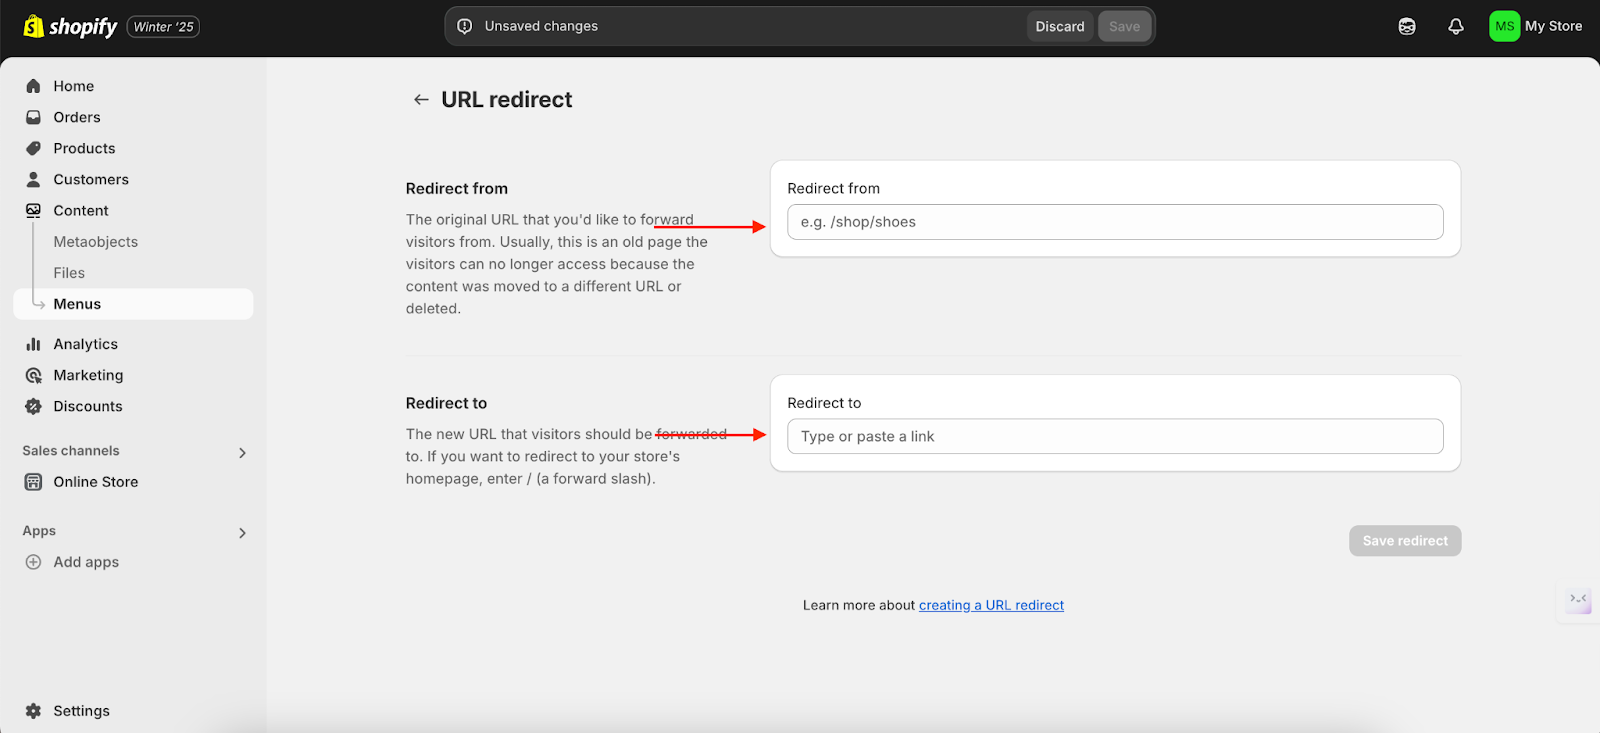
5. Click “Save redirect’’
To make the changes go smoothly, you need to prepare. First, let your customers know about the changes that are coming.
You can use email, social media, and banner announcements in your store to keep them updated.
It’s also important to update things like your business cards, email signatures, and social media profiles.
Make sure to check the new website link on different devices to confirm it works well.
Changing your Shopify store’s name and URL might seem like a big move, but it’s a chance to make your brand stronger. With some planning and the right tools, you can make the switch seamlessly.
Embrace the changes and see how your updated branding can create new opportunities for your business.
Yes, you can change your store’s URL, but only the myshopify.com domain can be updated. The custom domain (e.g., yourstorename.com) can be changed separately.
What is dropshipping?